Drop Shipping Example
Documentation Use Cases Patrick’s Prints!
Use Case 1: Patrick’s Prints! 🎨
Every shop starts with a dream, and in this dream you are a successful comic artist based in Brazil who is interested in selling their art to your adoring fans in the form of cards, t-shirts, and mugs. You also sell original prints and sketches which you produce in your own studio.
How do you combine your drop shipping amounts with shipping from your studio to give your customer’s the most accurate shipping price at checkout?
Let’s try Parcelify!
What you will learn in this case study
- How to add multiple shipping areas to Parcelify
- How to implement drop shipping charges in our app
- How to add a unique shipping charge on a product
- How Parcelify shipping rates calculate and add these shipping prices
Store specifics
First, let’s take a look at your local dropship prices:
- T-shirts: R$5 national flat rate
- Mugs: R$3 national flat rate
- Cards: R$1.50 national flat rate
Easy. Next let’s look at your local shipping for your handmade prints:
- Shipping within Brazil: R$1.00 per print
- Shipping to the southern regions of South America: R$4 per print
- (Chile, Paraguay, Argentina, and Uruguay)
- Shipping to the remaining North-Eastern regions of South America: R$3 per print
A little more involved, but nothing we can’t handle.
Creating a strategy
It may be tempting to jump right in and start creating shipping rates. After all, this may very well be the last step you have to take before launching a new line of products - or your entire store! However, it is important that you take a moment to plan out what rates you need and where you need them before you begin building them with Parcelify.
Our app works by first defining where you ship from (Locations) and where you ship to (Zones).
Note: Drop shippers use your default location, so in this example you only have to worry about adding a single location.
Next, let’s consider where you are shipping to: your shipping zones. Since you can define your zones as a series of regions for South America, you decide that you need three. Brazil, Southern regions, and Northern regions. Your national flat rates apply everywhere, so you will need to add those prices to each of your shipping rates in all three regions.
Finally, let’s think about your products themselves. Parcelify needs to be able to identify each product group in order to assign specific prices to them. Since mugs, tees, and card are all types of products, it makes sense to use product type in Shopify to tell them apart. Otherwise, If it’s easier, you may want to use product tags or add each group of products to a collection. Just keep in mind which one you use, it’ll be important later on!
Now you have a plan. Add one location. Add three shipping zones. Build one rate for each zone, then add your product based shipping prices to those rates. Let’s jump in!
Adding your first shipping zone
Now you’re ready to open the Parcelify app. Start by adding your default shipping location.
After that, let’s make our first shipping zone. Click on your location and then click [Add shipping Zone]. You start with your home country and name your first shipping zone Brazil. Next you click [Add Countries], either search or scroll to Brazil, select the checkbox next to it, and click [Done]. Finally, click [Save] to add this shipping zone.
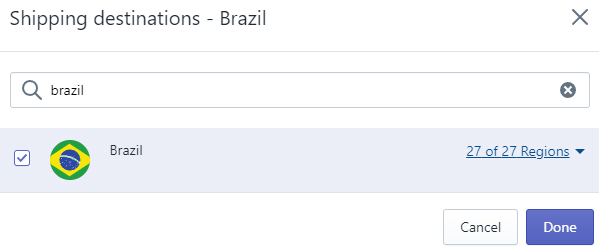
(See our full guide here for more details: Shipping Zones)
Designing your shipping rate
Now it’s time to add your shipping rate. This represents the combined service of your drop shipper cost plus the cost for you to send out any prints, so we only need one rate. You click [Add shipping rates] to get started.
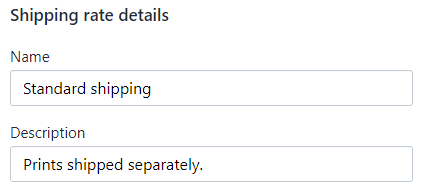
First our app will list your current location and shipping zone. Underneath that is your Shipping rate details. Along with the shipping price, this is what your customers will actually see at checkout.
You give it the name: Standard shipping to Brazil
.. and the description: Prints shipped separately
(If you have a shipping time estimate, feel free to add it to the rate name or description)
Next is the Shipment Restrictions. These apply to the entire order and must all be true for this rate to show. You don’t have any restrictions to add at this step, but it’s good to know what each part of our rate page does.
(If you are curious to know more about rate restrictions, look here)
Your drop shipping prices
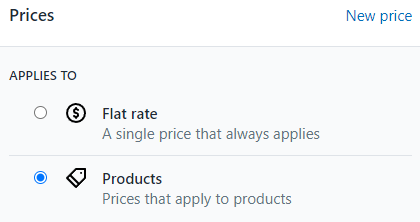
Now we are down to our prices. These are where you define how the total amount for this shipping rate should be calculated. Every new rate starts with a default ‘flat rate’ price. This works great for simple shipping setups, but you need to customize prices based on the products in the customer’s cart. So, you change the radio button from ( ) Flat Rate to (x) Products.
You start by adding the price for your t-shirts. You only want this price to apply to tees, so next to Products you click Add Restriction. A new dropdown and textbox appear. You select Product type is from the dropdown and enter t-shirts in the text box.
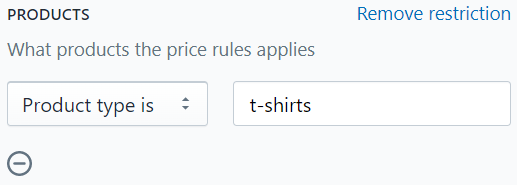
To add the shipping amount for this item you scroll down until you see Price: How to charge. The default is flat rate. Perfect. Enter 5 in the empty text box at the bottom and click [Done] to finalize this price.
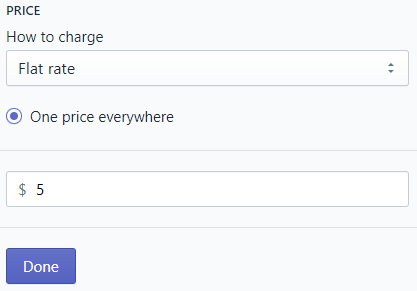
In summary: this shipping price will only apply to t-shirts and at least one t-shirt must be present at checkout for this amount to be added. Since it’s a flat rate the price will be the same no matter how many t-shirts are ordered.
Now it’s time to add your Mugs shipping price. From here you will see a pattern start to emerge.
Click [New Price].
Change it from ( ) Flat Rate to (x) Products
Add your product restriction. Product type is mugs
Scroll down to the flat rate price and enter 3
Click [Done]
Finishing up your drop shipping prices, you add your cards.
Click [New Price], change to (x) Products, add your cards restriction, add your 1.50 flat rate, and click [Done]. You’re getting good at this.
Prints shipping
Finally, it’s time to add your your unique prints shipping prices for this zone. Add a [New price] just like before, change it to (x) Products, and add the restriction Product type is prints.
Now the steps are a little different. You do not want to charge a flat rate for these prints, but per item. In the dropdown under Price: How to ship, select Item Based. Suddenly a few more options appear. Now the default option is (x) Per item, which is exactly what you want. All that is left to do is to add your per-item shipping amount for prints to this region: 1.
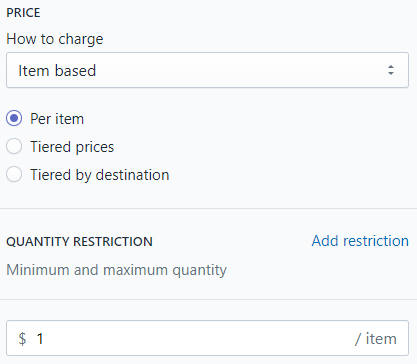
You click [Done], then scroll to the top and click [Save] to commit this entire shipping rate. All of your drop shipping and prints shipping costs are now calculated at the same time from a single shipping rate. Awesome.
Finishing up
From this point forward all that remains to do is continue adding shipping zones, adding your shipping rate, and including your prices for each rate as you go. Besides selecting different zones and entering different prices, the instructions are the exact same for each one.
Your rates at checkout
You’ve added all your zones, named and priced all your shipping rates, and your store is live to the world. Let’s see the result of all your hard work:
It appears that you have an order from your first customer! After browsing through your art they have checked out with three of your prints, a mug, and a couple of t-shirts. We know from your settings that:
- The T-shirts are a flat R$5
- The mug is a flat R$3
- Your prints are a dollar a piece to ship. 3 prints means R$3 in shipping
This totals R$11 dollars in shipping. Does this match what your customer sees at checkout?
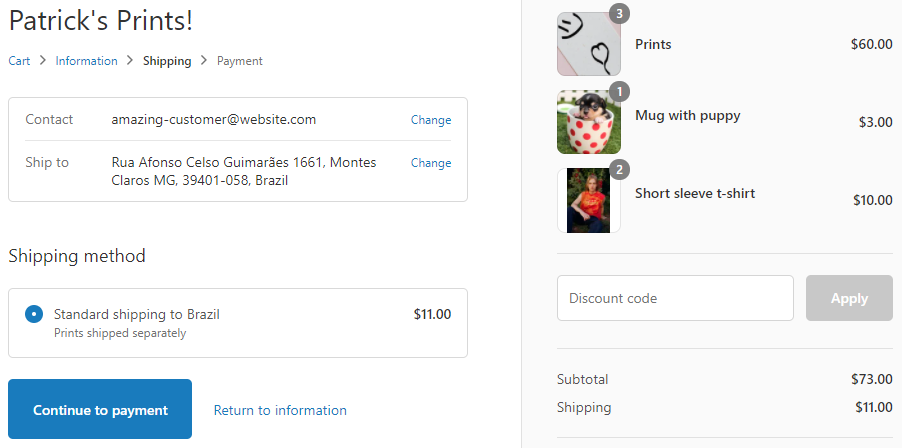
Down to the last centavo. 🎯