Tiered by destination
Tiered by destination is a shipping Price based on where an order ships to and how much it weighs, costs, or the number of items in the cart.
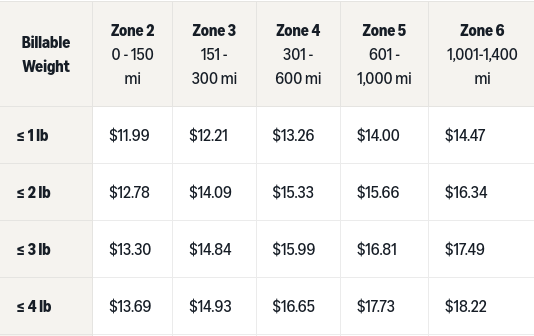
The best place to implement a tiered-by-destination price is when you have many different shipping regions and shipping prices all related to one another by some increasing product amount. This approach to shipping is commonly called a rate card.
Getting started
Before you start clicking through the UI, decide two things:
- How your ranges are defined. Tiered by destination is available under all three “How to charge” modes:
- Weight based: ranges are weight breakpoints (e.g. 0 – 50kg)
- Price based: ranges are order cost breakpoints (e.g. $0 – $50)
- Item based: ranges are quantity breakpoints (e.g. 0 – 10,000 items)
- How your destinations are matched. Under Destinations, you can match on:
- Zip / Postal code is: use this when your list has full postal codes
- Zip / Postal code starts with: use this when your list has postal code prefixes
- City is / City starts with
- UK Postcode Area is / UK Outward Code is
You can enter more than one value per tier as a comma-separated list. For example, a single tier can cover several postal code prefixes at once.
Create a Price from scratch
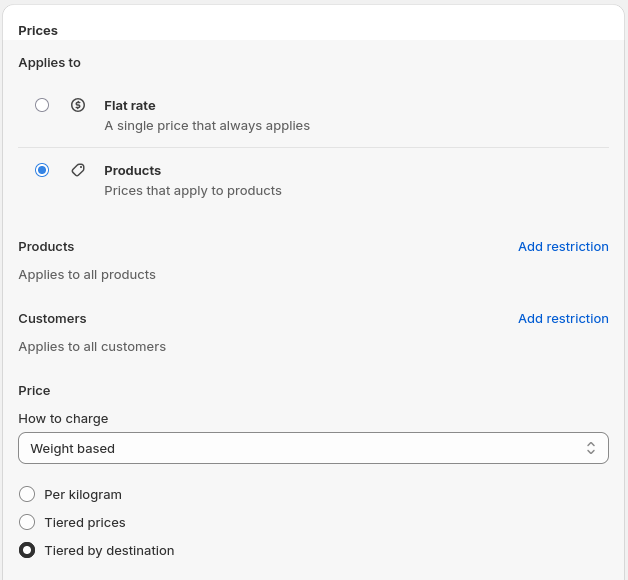
- Under Applies to, change this Price from Flat rate to Products
- Under Price: How to charge, select the mode you decided on above — Weight based, Price based, or Item based. The remaining steps are identical regardless of which one you pick; only the field units change
-
A new set of radio buttons appears. Select Tiered by destination
- Under Destinations, choose how postal codes should be evaluated. (see Getting started for the full list of options)
-
Two fields appear: Destination (the postal codes for this tier) and a range field labeled with your chosen units, e.g. 0 - 100 items (the price for that destination within that range)
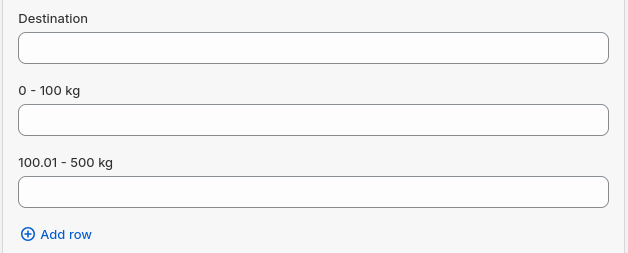
- Enter your first zone’s postal codes into Destination
- Enter the shipping price for that zone into the range field
- Click (+) Add row
-
The postal codes and price you entered appear in the table above these fields
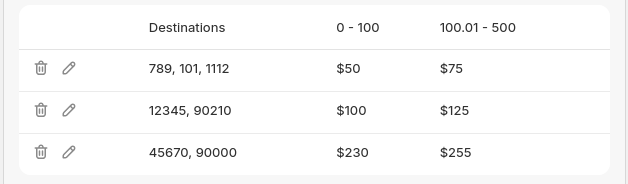
- Repeat steps 5–8 for each remaining destination you would like to add
-
Every new Price starts with one generic placeholder tier. Delete it by clicking the trash-can icon next to it

- Click [Done] at the bottom of the Price
- Scroll to the top and click [Save]. This runs validation on the Price and commits your changes
Edit an existing tier
To change the postal codes or price on a tier you’ve already added, without deleting and re-creating the row:
-
Click the pencil icon directly to the left of the tier to open it for editing

- Update the Destination value and/or the price for each range as needed
- Click (✔) Done to commit the change to that row (While editing, the tier’s (+) Add row control relabels to (✔) Done)
Important: This row-level (✔) Done is not the same button as the Price’s [Done] button. Confirming a tier’s edit here does not save the Price — you still need to click the Price’s [Done] button when you’re finished editing every tier, then [Save] the rate.
Edit ranges
Ranges are shared across every tier in the Price. adding a range adds a new price field to every destination row, while removing one removes it from every row.
-
Click the blue “Edit Ranges” link to open the range editor
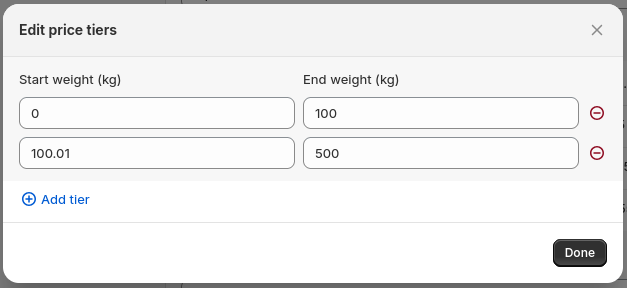
- Click the blue “Add tier” link to add a new range, then enter its start and end values — or adjust an existing range’s boundaries directly in the modal
- Click the red minus icon next to a range to remove it
- Click [Done] to close the range editor and return to the Price
Example
Say you run a fishing and hiking shop based in Quebec. Shipping across the rest of the country is a flat rate, but inside Quebec you want a rate card with three zones, each priced by how many items are in the order:
City of Montreal (postal codes starting with H)
- 1–5 items: $5
- 6–20 items: $10
- 21+ items: $15
Northwest Quebec (postal codes starting with J)
- 1–5 items: $9
- 6–20 items: $14
- 21+ items: $19
Northeast Quebec (postal codes starting with G)
- 1–5 items: $7
- 6–20 items: $12
- 21+ items: $17
You already know your postal code prefixes, so under Destinations you pick Zip / Postal code starts with. Under Price: How to charge you pick Item based, then Tiered by destination.
You open the range editor (see Edit ranges) and define three item-count ranges: 1–5, 6–20, and 21–999. Then you add your three tiers, one per postal code prefix, entering the matching price into each range’s field:
| Destination | 1–5 items | 6–20 items | 21+ items |
|---|---|---|---|
| H | $5 | $10 | $15 |
| J | $9 | $14 | $19 |
| G | $7 | $12 | $17 |
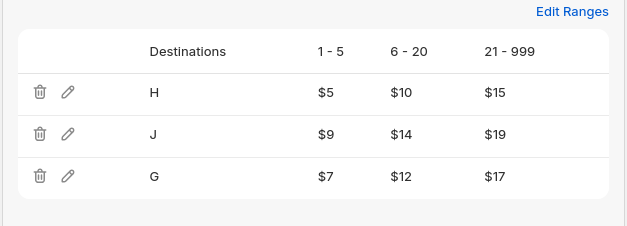
Once every tier and range is entered, delete the generic placeholder tier, click [Done] on the Price, and [Save] the rate.