To sign up, please reach out to us at protect@cleverfew.co.
Protect Checkout Button
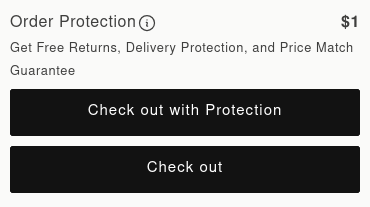
The Protect Checkout Button is a button and price summary you place directly above your cart’s existing checkout button. Customers click Check out with Protection to add Parcelify Protect to their order.
How it works
Clicking Check out with Protection adds a Protect line item to the cart and sends the customer to checkout. Your theme’s own checkout button stays in place and continues to work as normal, allowing customers to continue to checkout without protection.
You should confirm this method is selected on the Protect settings page before you install the button. If your shop offers Protect as a shipping rate or a checkout add-on instead, see Cart Protection Toggle or Checkout Protection Toggle.
Installing the button
- Open Parcelify in your Shopify admin
- Select Components from the left-hand navigation menu
- Find the Protect Checkout Button card and click [Install]. (This doesn’t change how your cart page looks yet)
- A “Protect Checkout Button Component Installed” dialog opens. It confirms the button is ready to use and prompts you to click [Install App Block] to add it to your theme. Three buttons are available:
- [Copy Theme Snippet]. Copies the button’s code to your clipboard so you can place it by hand. Continue with Placing it manually below
- [Install App Block]. Opens the Shopify theme editor so you can place the button now. Continue with Placing it with the theme editor below
- [Okay]. Closes the dialog. Place the button later using either method below
Placing it with the theme editor
- In the theme editor, open your cart page
- Find the Protect Checkout Button block in the block list
- Drag the block into position directly above your theme’s checkout button
- Click [Save] to publish the change
Placing it manually
Use this method if your theme isn’t Online Store 2.0, or if you want finer control over the button’s markup.
- Click [Copy Theme Snippet] in the install confirmation dialog to copy the button’s code to your clipboard
-
In your Shopify admin, go to Online Store, click the … next to your theme, then click [Edit code]
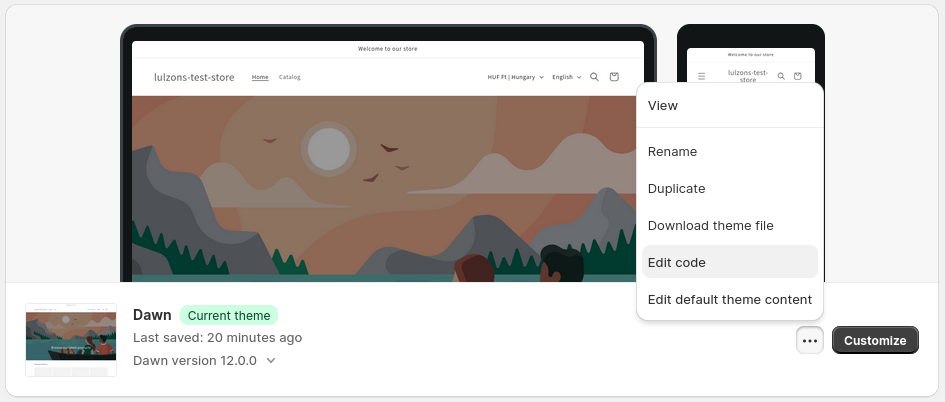
- Open your cart page’s template. Common names include
cart-template.liquid,main-cart-footer.liquid, or similar. Find your theme’s checkout button, often inside a class namedcart__submit-controls - Paste the snippet directly above the checkout button, then save
Note: Filenames and code structure vary by theme. Preview your cart page after saving to confirm the button appears where you expect.
Customizing the look
- Click [Configure] on the button’s card to open the Component Theme Editor
- Adjust the style controls on the left. Available controls include color pickers, dropdowns, sliders, and text fields, depending on the button’s design. Watch the preview on the right update as you go
- Click [Save & Publish] when you’re happy with the result. If this is the first time you’ve customized the button for this theme, you’ll be asked to finish installation by clicking [Install App Block]