To sign up, please reach out to us at protect@cleverfew.co.
Enabling Protection
To enable Parcelify Protect:
- Navigate to the Parcelify app in your Shopify admin area
- Once opened, select Settings from the left-hand menu
- In the Parcelify Protect section of your Parcelify settings, click Enable Protect
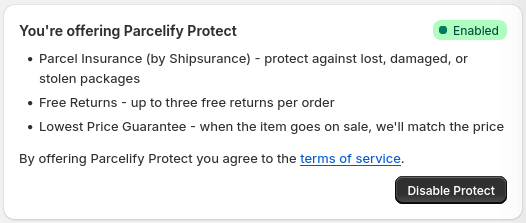
Choose how Protect is offered
Parcelify Protect can be offered to your customers three ways: as a shipping rate, as a cart add-on, or as a checkout add-on.
- Shipping rate - Protect appears as a shipping rate the customer selects at checkout.
- Cart add-on - Protect is added as a line item in the cart.
- Checkout add-on - Protect is offered inside Shopify checkout.
Learn more about each of these options below. Once you have decided, select an offer method in the Parcelify Protect section of your Parcelify settings and click Save.
Shipping rate
When Protect is offered through a shipping rate, each one of your Parcelify rates is paired with a second rate labeled (Protected). How these rates are displayed (and what rates are eligible/disabled for protection) can be configured via the instructions below.
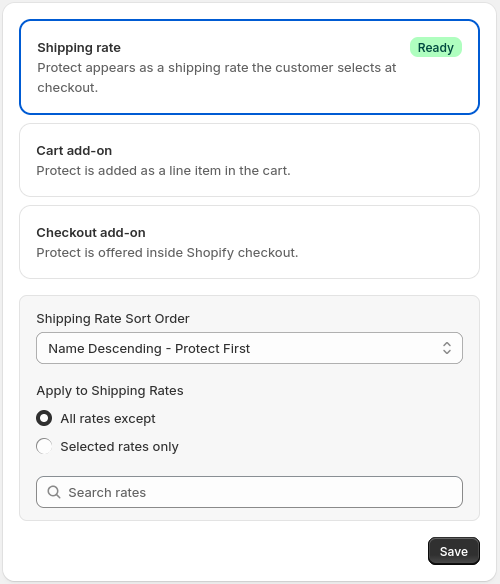
Rate Sorting
Parcelify lets you control what order your shipping rates display at checkout, as well as the option to prioritize your Protected rates.
If you click the dropdown under the Shipping rate sort order label, you will be presented with the following options:
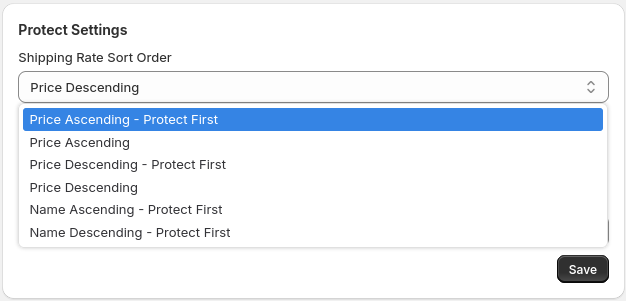
Note: Protected rates are always grouped with the standard version of each rate.
Price Ascending - Protect First
Sorted by price, lowest to highest, Protect rates show first.
Price Ascending
Sorted by price, lowest to highest. (This is the default Shopify sorting.)
Price Descending - Protect First:
Sorted by price, highest to lowest, Protect rates shown first.
Price Descending
Sorted by price, highest to lowest.
Name Ascending - Protect First
Sorted in alphabetical order, A to Z, Protect rates shown first.
Name Descending - Protect First
Sorted in reverse alphabetical order, Z to A, Protect rates shown first.
Select which rates are eligible for Parcelify Protect
By default, Parcelify protect will offer protection for all of your Parcelify rates. If you wish to limit what rates are eligible for shipping protection, you may do so with Protect Settings:
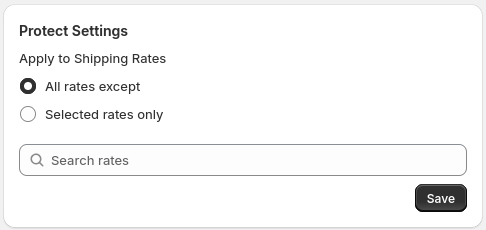
First, decide whether you want to include Protect on all of your Parcelify rates except those listed, or if you want to select specific rates to be protected:
- All rates except - protection will be offered on all of your Parcelify rates except the ones you choose
- Selected rates only - protection will only be offered on the rates you choose
After that, you may search for and select shipping rates in the text field that says ‘Search rates’
Once you are happy with your rate selections, click Save in the bottom right
Cart add-on
The Cart add-on requires a Storefront Component to be installed on your cart page. If Parcelify doesn’t detect one, a Setup needed badge appears next to Cart add-on and a panel prompts you to add a cart component. Click View components to go to your Storefront Components and install one.
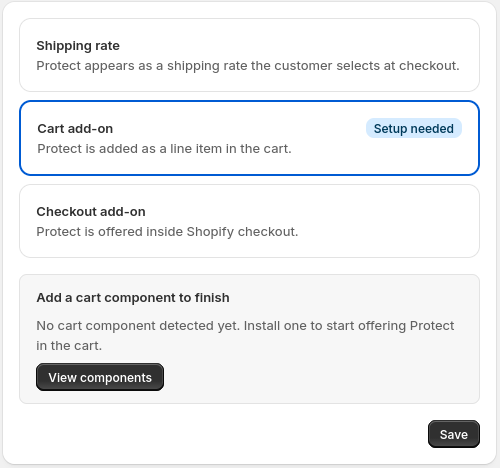
Installing cart and checkout components is covered on the Protect Components page.
Checkout add-on
The Checkout add-on requires a Storefront Component to be installed on your checkout page. If Parcelify doesn’t detect one, a Setup needed badge appears next to Checkout add-on and a panel prompts you to set one up. Click View components to go to your Storefront Components and install one, or click All done if you’ve already added it.
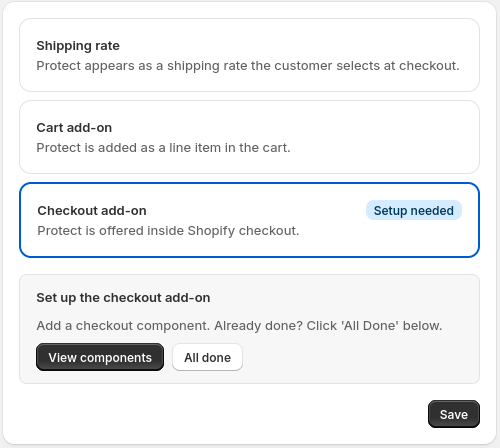
Installing cart and checkout components is covered on the Protect Components page.
Disabling Protection
You may disable Parcelify Protect in a similar way to how you originally enabled it:
- Navigate to the Parcelify app in your Shopify admin area
- Once opened, select Settings from the left-hand menu
- In the Parcelify Protect section of your Parcelify settings, click Disable Protect
Now that Parcelify Protect is enabled on your shop and you’ve decided what rates are protected, add our UI Extension to your checkout to notify customers what benefits are on offer when selecting a Protected rate. Click Protect UI Extension below to learn more: